Disclaimer:
(1) First of all, I apologise for the appalling photographs. For some unknown reason, my "print screen"
(2) I'm sure there's a more professional way of doing this, but as I don't have
(3) This works only if you are using the new blogger that allows you to add gadgets and customise your layout. If you're using an actual template, you could possibly host your image on photobucket and then add a HTML code to your template. But that's too much thinking for me. Pass!
--------------------------------------------------------------------------------------------------------------------------
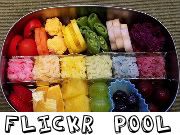
1. Open a word document and insert a text box. Inserting a text box allows you to copy the entire thing and paste it onto a Paint document which is saved as a jpeg file that can be uploaded onto blogger. Size your text box to the exact size you want it on your blog and type in the title. 2. Add images around the title. For a seamless look, the images should be all landscape or all portrait. For DN's blog, I chose only the portrait images. For my sister's blog, I chose only the landscape images. Resize the images so they're all the same size.
 3. For this header, I decided to have 2 rows of images, with the title in between. You can adjust the size of the text box as you go along.
 4. Once you're happy with your basic title piece, highlight the text box, right click and select "copy".
 5. Open a Paint file, select "edit" and click on "paste".
 6. If you want, you can start filling the background in with colour. Click on the paint can icon, choose a colour from the bottom and click on the area you want filled in with colour.
 7. I only filled in the top and bottom with colour because I wanted to manually spray in the rest for a graffiti effect.
 8. To spray in colour, click on the spray can icon ("airbrush").
 9. Because Paint only allows you to undo the LAST command, be very careful when "spraying". The minute you make a mistake, quickly undo it. To be safe, I did the outlines first (slowly), then sprayed in the colour.
 10. If you look closely, my images were of different sizes. Ugly! So I used a black spray to cover it up.
 11. Done! The outline also makes everything look less stark because you can't see the harsh lines.
 11. The rainbow effect came out quite well I think. Don't forget to save the file!
 12. Log in to your blogger account and go to your dashboard. Click on "layout".
 13. You should see the "page elements" page. Click here to "edit" your title bar.
 14. Under "image", click on "browse" and upload the completed Paint file.
 15. Under "placement", click on "instead of file and description". This means your image will replace your old title and/or description.
 16. Once blogger has uploaded your image, it should look something like this. Click on "save" and go check it out. You're done!
 And this is how my sister gets a *new* header for her blog! Click here to see it for real.
 If you do create your own header, I would be thrilled to have a look at it. Absolutely thrilled. Please drop your blog link in the comments box when you're done! :D









No comments:
Post a Comment